

PHP - Move Array to Beginning or End of array
Move element to first array by key
$myArray = array('one' => $myArray['one']) + $myArray;
Move element to end array by key
$myArray = $myArray +array('one' => $myArray['one']);
$myArray = array('one' => $myArray['one']) + $myArray;
$myArray = $myArray +array('one' => $myArray['one']);
$date = "07/12/2010";
$your_date = date("Y-m-d", strtotime($date));<?php
if (strpos($_SERVER['HTTP_USER_AGENT'], '(compatible; MSIE ')!==FALSE) {
//action for internet explorer
header('location:form-ie.php?idu='.$_GET['idu']);
} else {
//action for other browser
header('location:form.php?idu='.$_GET['idu']);
}
window.onunload=function(){SomeJavaScriptCode};
$(window).unload(function() {
//some javascript code
}
 Banyak Programmer PHP tidak mengetahui sejarah dari PHP, berikut adalah sedikit sejarah pendek dari bahasa pemrograman yang sangat populer di seluruh dunia.



RewriteCond %{REQUEST_URI} !/folderName
<?php
$data = array(
'name' => array(
'first' => 'Randy',
'last' => 'Septian'
),
'phone' => array(
'personal' => array(
'mobile' => '085687xxxxx',
'home' => '0217788xxxx'
),
'office' => array(
'fax' => '0217788xxxx'
)
),
'gender' => 'male'
);
$xml = new XmlWriter();
$xml->openMemory();
$xml->startDocument('1.0', 'UTF-8');
$xml->startElement('root');
function write(XMLWriter $xml, $data){
foreach($data as $key => $value){
if(is_array($value)){
$xml->startElement($key);
write($xml, $value);
$xml->endElement();
continue;
}
$xml->writeElement($key, $value);
}
}
write($xml, $data);
$xml->endElement();
echo $xml->outputMemory(true);
?>
$yesterday = date("Y-m-d",strtotime("-1 day"));echo $yesterday;
ALTER TABLE `table-name` CHANGE `table-name`. `field_name` TEXT CHARACTER SET utf8 COLLATE utf8_general_ci NOT NULL
echo $testing;print_r(error_get_last());?>Output :
Array([type] => 8[message] => Undefined variable: testing[file] => C:\webfolder\test.php[line] => 2)
| Parameter | Description |
|---|---|
| error | Required. The error message to log |
| type | Optional. Specifies the error log type. Possible log types:
|
| destination | Optional. Specifies where to send the error message. The value of this parameter depends on the value of the "type" parameter |
| headers | Optional. Only used if the "type" parameter is "1". Specifies additional headers, like From, Cc, and Bcc. The additional headers should be separated with a CRLF (\r\n).Note: When sending an email, it must contain a From header. This can be set with this parameter or in the php.ini file. |
$test=2;
if ($test>1){error_log("A custom error has been triggered",1,"someone@example.com","From: webmaster@example.com");}?>
A custom error has been triggered
| Value | Constant | Description |
|---|---|---|
| 1 | E_ERROR | Fatal run-time errors. Errors that can not be recovered from. Execution of the script is halted |
| 2 | E_WARNING | Non-fatal run-time errors. Execution of the script is not halted |
| 4 | E_PARSE | Compile-time parse errors. Parse errors should only be generated by the parser |
| 8 | E_NOTICE | Run-time notices. The script found something that might be an error, but could also happen when running a script normally |
| 16 | E_CORE_ERROR | Fatal errors at PHP startup. This is like an E_ERROR in the PHP core |
| 32 | E_CORE_WARNING | Non-fatal errors at PHP startup. This is like an E_WARNING in the PHP core |
| 64 | E_COMPILE_ERROR | Fatal compile-time errors. This is like an E_ERROR generated by the Zend Scripting Engine |
| 128 | E_COMPILE_WARNING | Non-fatal compile-time errors. This is like an E_WARNING generated by the Zend Scripting Engine |
| 256 | E_USER_ERROR | Fatal user-generated error. This is like an E_ERROR set by the programmer using the PHP function trigger_error() |
| 512 | E_USER_WARNING | Non-fatal user-generated warning. This is like an E_WARNING set by the programmer using the PHP function trigger_error() |
| 1024 | E_USER_NOTICE | User-generated notice. This is like an E_NOTICE set by the programmer using the PHP function trigger_error() |
| 2048 | E_STRICT | Run-time notices. PHP suggest changes to your code to help interoperability and compatibility of the code |
| 4096 | E_RECOVERABLE_ERROR | Catchable fatal error. This is like an E_ERROR but can be caught by a user defined handle (see also set_error_handler()) |
| 8191 | E_ALL | All errors and warnings, except level E_STRICT (E_STRICT will be part of E_ALL as of PHP 6.0) |
//Disable error reportingerror_reporting(0);
//Report runtime errorserror_reporting(E_ERROR | E_WARNING | E_PARSE);
//Report all errorserror_reporting(E_ALL);?>
//custom error handler functionfunction customError($errno, $errstr, $errfile, $errline) { echo "Custom error: [$errno] $errstr
"; echo " Error on line $errline in $errfile
"; }
//set user-defined error handlerset_error_handler("customError");
$test=2;
//trigger errorif ($test>1) { trigger_error("A custom error has been triggered"); }
//restore built-in error handlerrestore_error_handler();
//trigger error againif ($test>1) { trigger_error("A custom error has been triggered"); }?>
Custom error: [1024] A custom error has been triggeredError on line 14 in C:\webfolder\test.php
Notice: A custom error has been triggered in C:\webfolder\test.php on line 21
I want to enter comment with <script>alert('this xss attack'); </scipt>
function xss_filtering($text) {
$f = stripslashes (strip_tags (htmlspecialchars ($text, ENT_QUOTES)));
return $f;
}
$text_comment = xss_filtering($_POST['comment']);
SELECT * FROM user_table WHERE username=' ' OR 1=1;// ' AND password ='anything';
function sql_injection_filtering($data){
$filter = mysql_real_escape_string($data);
return $filter;
}
$username = sql_injection_filtering($_POST['username']);
$password = sql_injection_filtering($_POST['password']);
if (!ctype_alnum($username) OR !ctype_alnum($password)){
echo "Only alpha numeric";
} else {
echo "Login Succes";
}
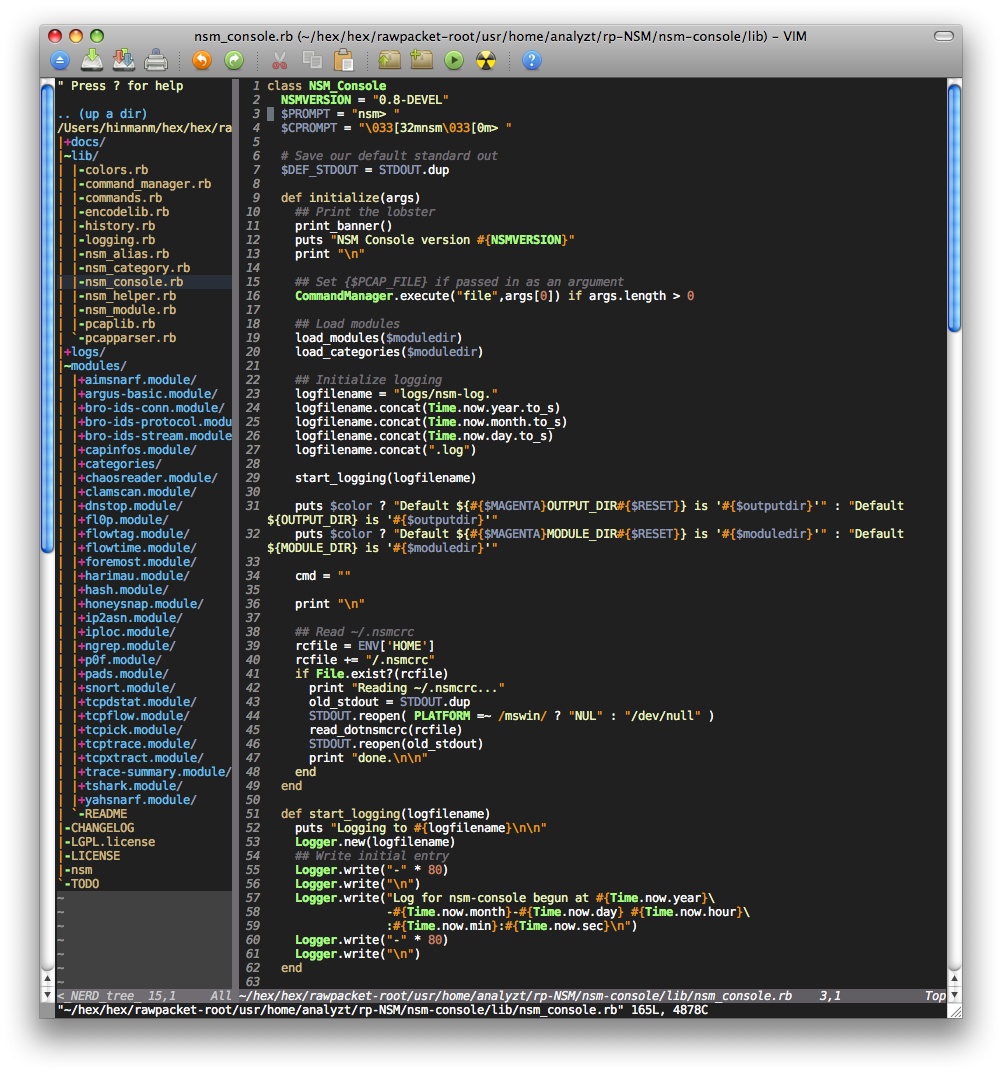 Namun dari kekurangan fungsi gvim, saya masih tetap menggunakan netbeans, tapi yang saya inginkan memiliki tampilan skema warna yang sama seperti gvim untuk netbeans saya... dan akhirnya saya temukan..
 berikut link download untuk skema warna untuk netbeans yang bernama desert
<?php
function curPageURL() {
$pageURL = 'http';
if ($_SERVER["HTTPS"] == "on") {$pageURL .= "s";}
$pageURL .= "://";
if ($_SERVER["SERVER_PORT"] != "80") {
$pageURL .= $_SERVER["SERVER_NAME"].":".$_SERVER["SERVER_PORT"].$_SERVER["REQUEST_URI"];
} else {
$pageURL .= $_SERVER["SERVER_NAME"].$_SERVER["REQUEST_URI"];
}
return $pageURL;
}
?>
<?php
$ext_image = $_FILES['namafile']['type']; // mendapatkan extension file yang di upload
$name_image = $_FILES['namafile']['nama']; // mendapatkan nama file yang di upload
$vdir_upload = $_SERVER['DOCUMENT_ROOT'].'/webgw/images/upload/'; // menentukan direktori untuk tempat gambar asli dan hasil di folder yang sama, ini gw pake ubuntu jadi bisa tentuin direktori lo aja
$vfile_upload = $vdir_upload . $name_image; // ini ambil file asli
// menyesuaikan type gambar yang akan di resize
switch($ext_image)
{
case 'image/jpg':
case 'image/jpeg':
$im_src = imagecreatefromjpeg($vfile_upload);
break;
case 'image/gif':
$im_src = imagecreatefromgif($vfile_upload);
break;
case 'image/png':
$im_src = imagecreatefrompng($vfile_upload);
break;
default:
$im_src = false;
break;
}
// mengambil ukuran asli dari gambar width dan height
$src_width = imageSX($im_src);
$src_height = imageSY($im_src);
// menentukan ukuran file yang akan dibuat
$dst_width = 120;
$dst_height = 20;
// Proses pembuatan image
$im = imagecreatetruecolor($dst_width,$dst_height);
imagecopyresampled($im, $im_src, 0, 0, 0, 0, $dst_width, $dst_height, $src_width, $src_height);
// nah ini proses penyimpanan image hasil ke folder yang sama berdasarkan extensinya, trus hasil gambar gw kasi nama hasil_namafile.pg
switch($ext_image)
{
case 'images/jpg':
case 'iamges/jpeg':
imagejpeg($im2,$vdir_upload . "hasil_" . $name_image);
break;
case 'images/gif':
imagegif($im2,$vdir_upload . "hasil_" . $name_image);
break;
case 'images/png':
imagepng($im2,$vdir_upload . "hasil_" . $name_image);
break;
default:
break;
}
//hapus gambar di memory
imagedestroy($im_src);
imagedestroy($im);
<?phpfunction isMobile() {if(isset($_SERVER["HTTP_X_WAP_PROFILE"])) {return true;}if(preg_match("/wap\.|\.wap/i",$_SERVER["HTTP_ACCEPT"])) {return true;}if(isset($_SERVER["HTTP_USER_AGENT"])){$user_agents = array("midp", "j2me", "avantg", "docomo", "novarra", "palmos", "palmsource", "240x320", "opwv", "chtml", "pda", "windows\ ce", "mmp\/", "blackberry", "mib\/", "symbian", "wireless", "nokia", "hand", "mobi", "phone", "cdm", "up\.b", "audio", "SIE\-", "SEC\-", "samsung", "HTC", "mot\-", "mitsu", "sagem", "sony", "alcatel", "lg", "erics", "vx", "NEC", "philips", "mmm", "xx", "panasonic", "sharp", "wap", "sch", "rover", "pocket", "benq", "java", "pt", "pg", "vox", "amoi", "bird", "compal", "kg", "voda", "sany", "kdd", "dbt", "sendo", "sgh", "gradi", "jb", "\d\d\di", "moto");foreach($user_agents as $user_string){if(preg_match("/".$user_string."/i",$_SERVER["HTTP_USER_AGENT"])) {return true;}}}if(preg_match("/iphone/i",$_SERVER["HTTP_USER_AGENT"])) {return false;}return false;}if (isMobile()) {echo "mobile";}else{echo "web";}?>
CREATE TABLE berita
(
id_berita INT PRIMARY KEY AUTO_INCREMENT,
judul TEXT UNIQUE,
isi TEXT,
url_seo TEXT UNIQUE,
);
<html>
<head>
<title>Form Berita</title>
</head>
<body>
<form action="input.php" method="post" >
<input type="text" name="judul" />
<textarea name="isi" ></textarea>
<input type="submit" value="Input" />
</form>
</body>
</hrml>
<?phpinclude 'db.php';
//menghalau XSS attack
$judul = mysql_real_escape_string($_POST['judul']);
$isi = mysql_real_escape_string($_POST['isi']);
$judul = htmlentities($judul);
$isi = htmlentities($isi);
//Mengganti judul biasa menjadi judul SEO
$judul_baru= $judul;
$judul_baru=preg_replace('/[^a-z0-9]/i',' ', $judul_baru);
$judul_seo=str_replace(" ","-",$judul_baru);
//Input data ke database
mysql_query("insert into berita(judul, isi, url_seo) values('$judul','$isiy','$judul_seol')");
header('location:tampil_berita.php');
?>
<?phpinclude('db.php');//tampil berita$sql=mysql_query("select * from berita");$count=mysql_num_rows($sql);$body = '<table>';while ($row=mysql_fetch_array($sql)){$body .= ' <tr> <td> < a href ="berita-$row[id_berita]-$row[url_seo]" > $row[judul] </a> </td> </tr>';}?>$body .= '</table>';//HTML Part<body><?phpif($count){echo "<h1>$title</h1><div class='body'>$body</div>";}else{echo "<h1>404 Page.</h1>";}?>
<?php$id_berita = $_GET['id'];$query = mysql_fetch_array(mysql_query("select * from berita where id_berita = $id_berita "));echo '<p>'.$query['judul'].'</p>';echo '<p>'.$query['isi'].'</p>';?>
RewriteEngine On
RewriteRule ^berita-(.*).html$ baca.php?id=$1
hal_utama.php<html><head><title>Upload Form</title></head><body><?php echo $error;?>// jika file gagal d upload maka muncul error messgae<?php echo form_open_multipart('upload/upload_file');?>//form pembuka yg telah dilengkapi multipart form data<input type="file" name="fupload" size="20" /><br /><br /><input type="submit" value="upload" /></form></body></html>
hal_sukses.php<html><head><title>Upload Form</title></head><body><h3>Your file was successfully uploaded!</h3><ul><?php foreach($upload_data as $item => $value):?><li><?php echo $item;?>: <?php echo $value;?></li> // jika file berhasil di upload akan muncul informasi tentang file trsebut<?php endforeach; ?></ul><p><?php echo anchor('upload', 'Upload Another File!'); ?></p></body></html>
upload.php<?phpclass Upload extends CI_Controller {function __construct(){parent::__construct();$this->load->helper(array('form', 'url'));}function index(){$this->load->view('hal_utama', array('error' => ' ' ));}function upload_file(){$config['upload_path'] = './file/gambar/'; //direktori tempat gambar$config['allowed_types'] = 'gif|jpg|png'; // jenis file yg boleh di upload$config['max_size'] = '100'; // max ukuran file$config['max_width'] = '1024';$config['max_height'] = '768';$this->load->library('upload', $config); // perintah konfigurasi pada library uploadif ( ! $this->upload->do_upload()) // perintah upload{$error = array('error' => $this->upload->display_errors());$this->load->view('hal_utama', $error);}else{$data = array('upload_data' => $this->upload->data());$this->load->view('hal_ sukses', $data);}}}?>
........$this->load->library('upload', $config); // perintah konfigurasi pada library uploadif ( ! $this->upload->do_upload(fupload)) // saya menambahkan pada bagian ini{$error = array('error' => $this->upload->display_errors());$this->load->view('hal_utama', $error);}else.........
<div id="example"></div><script type="text/javascript">txt = "<p>Browser CodeName: " + navigator.appCodeName + "</p>";txt+= "<p>Browser Name: " + navigator.appName + "</p>";txt+= "<p>Browser Version: " + navigator.appVersion + "</p>";txt+= "<p>Cookies Enabled: " + navigator.cookieEnabled + "</p>";txt+= "<p>Platform: " + navigator.platform + "</p>";txt+= "<p>User-agent header: " + navigator.userAgent + "</p>";document.getElementById("example").innerHTML=txt;</script>